
참고글 여기를 보고 완료했다.
아래 링크에서 설치하란대로 다 하면 왠만하면 실행이 될것이나
나의 경우에는 좀더 풀어 써보려고 한다.
https://imranhsayed.medium.com/next-js-tailwindcss-with-sass-example-41eae3e38206
Next.js Tailwindcss with SASS example
Tailwind CSS is a highly customizable, low-level CSS framework that gives you all of the building blocks you need to build bespoke designs…
imranhsayed.medium.com
링크에서 터미널 명령어
설치하란대로 다 설치했다는 가정 하에 밑의 글은 참고로 보면 된다.
폴더 구성을 해준다.
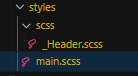
src/styles/main.scss
src/styles/scss/_Header.scss , _Footer.scss 등..
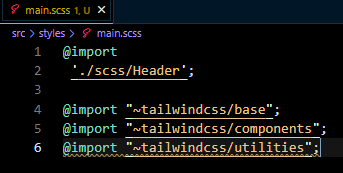
main.scss
지금은 Header.scss만 import했는데
추후에 Footer.scss등을 여기에 계속 추가해서 쓰면 된다.
tailwind에서만 썼던 global.css 내용 세줄이 여기에 들어간다.
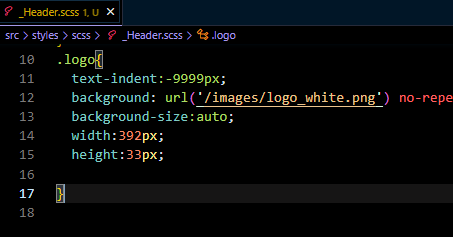
_Header.scss
package.json에 아래와 같은 명령어를 써준다.
여기서 아래에 쓴 sass명령어는 이렇게 동작한다
npm run sass 터미널에 입력하면
src/styles/main.scss를 루트폴더의 style.css로 컴파일해줘~
라는 명령을 실행한다.
이 컴파일 명령어는 빠져도 동작하는데 전혀 상관이 없다!
{
   "scripts": {
    	"node-sass": "node-sass",
    	"sass": "node-sass -wr --source-map true src/styles/main.scss style.css"
        }
}postcss.config.js 설정을 해준다.
module.exports = {
	plugins: {
		'postcss-import': {},
		autoprefixer: {},
		tailwindcss: {},
		'postcss-flexbugs-fixes': {},
		'postcss-preset-env': {
			autoprefixer: {
				flexbox: 'no-2009'
			},
			stage: 3,
			features: {
				'custom-properties': false
			}
		}
	}
}next.config.js 설정을 해준다.
const path = require('path');

module.exports = {
  generateEtags: true,
  reactStrictMode: true,
  trailingSlash: true,
  poweredByHeader: false,
  typescript: {
    ignoreBuildErrors: true,
  },
  sassOptions: {
    includePaths: [path.join(__dirname, 'styles')]
}
}
tailwind.config.js
module.exports = {
  future: {
		removeDeprecatedGapUtilities: true,
		purgeLayersByDefault: true,
	},
  purge: [
    "./src/**/*.{js,ts,jsx,tsx}",
  ],

  content: [
    "./src/**/*.{js,ts,jsx,tsx}",
  ],
  theme: {
    extend: {
      colors:{
        header: {
          blackbg: "#30363A",
          white:"#fff",
        },
     },
      fontFamily: {
        sans: ['Roboto'],

      },

    },
  },
  variants: {},

  plugins: [
    require( 'tailwindcss' ),
		require( 'precss' ),
		require( 'autoprefixer' )
  ],
}
src/pages/_app.tsx
여기엔 scss만 import하면 된다.
scss의 스타일은 className="" 으로 입력하면 된다.
import {HomeLayout} from '../components/layout/HomeLayout';

import '../styles/main.scss';

const Index = () => {
  return (
     <HomeLayout>
      <p className="demofontcolor">잘되는가???</p>

      // 밑부턴 그냥 테일윈드 템플릿
      이 부분은 Layout의 children에 해당하는 영역에 들어갈 것입니다.
      <section className="text-gray-600 body-font">
  <div className="container flex flex-wrap px-5 py-24 mx-auto items-center">
    <div className="md:w-1/2 md:pr-12 md:py-8 md:border-r md:border-b-0 mb-10 md:mb-0 pb-10 border-b border-gray-200">
      <h1 className="sm:text-3xl text-2xl font-medium title-font mb-2 text-gray-900">Pitchfork Kickstarter Taxidermy</h1>
      <p className="leading-relaxed text-base">Locavore cardigan small batch roof party blue bottle blog meggings sartorial jean shorts kickstarter migas sriracha church-key synth succulents. Actually taiyaki neutra, distillery gastropub pok pok ugh.</p>
      <a className="text-indigo-500 inline-flex items-center mt-4">Learn More
        </a>
    </div>
    <div className="flex flex-col md:w-1/2 md:pl-12">
      <h2 className="title-font font-semibold text-gray-800 tracking-wider text-sm mb-3">CATEGORIES</h2>
      <nav className="flex flex-wrap list-none -mb-1">
        <li className="lg:w-1/3 mb-1 w-1/2">
          <a className="text-gray-600 hover:text-gray-800">First Link</a>
        </li>
        <li className="lg:w-1/3 mb-1 w-1/2">
          <a className="text-gray-600 hover:text-gray-800">Second Link</a>
        </li>
        <li className="lg:w-1/3 mb-1 w-1/2">
          <a className="text-gray-600 hover:text-gray-800">Third Link</a>
        </li>
        <li className="lg:w-1/3 mb-1 w-1/2">
          <a className="text-gray-600 hover:text-gray-800">Fourth Link</a>
        </li>
        <li className="lg:w-1/3 mb-1 w-1/2">
          <a className="text-gray-600 hover:text-gray-800">Fifth Link</a>
        </li>
        <li className="lg:w-1/3 mb-1 w-1/2">
          <a className="text-gray-600 hover:text-gray-800">Sixth Link</a>
        </li>
        <li className="lg:w-1/3 mb-1 w-1/2">
          <a className="text-gray-600 hover:text-gray-800">Seventh Link</a>
        </li>
        <li className="lg:w-1/3 mb-1 w-1/2">
          <a className="text-gray-600 hover:text-gray-800">Eighth Link</a>
        </li>
      </nav>
    </div>
  </div>
</section>
    </HomeLayout>
   )
}

export default Index;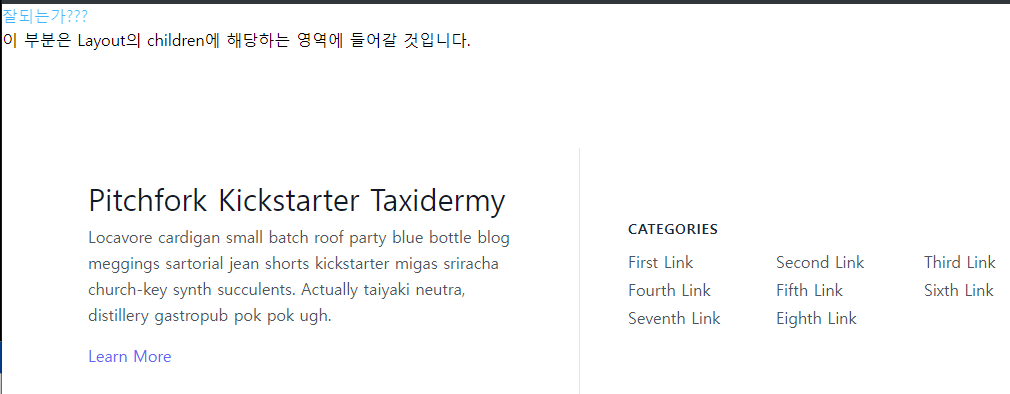
_Header.sass로 쓴 스타일 태그와
tailwindcss 가 잘 동작함을 볼수 있다.
'React' 카테고리의 다른 글
참고글 여기를 보고 완료했다.
아래 링크에서 설치하란대로 다 하면 왠만하면 실행이 될것이나
나의 경우에는 좀더 풀어 써보려고 한다.
https://imranhsayed.medium.com/next-js-tailwindcss-with-sass-example-41eae3e38206
Next.js Tailwindcss with SASS example
Tailwind CSS is a highly customizable, low-level CSS framework that gives you all of the building blocks you need to build bespoke designs…
imranhsayed.medium.com
링크에서 터미널 명령어
설치하란대로 다 설치했다는 가정 하에 밑의 글은 참고로 보면 된다.
폴더 구성을 해준다.
src/styles/main.scss
src/styles/scss/_Header.scss , _Footer.scss 등..
main.scss
지금은 Header.scss만 import했는데
추후에 Footer.scss등을 여기에 계속 추가해서 쓰면 된다.
tailwind에서만 썼던 global.css 내용 세줄이 여기에 들어간다.
_Header.scss
package.json에 아래와 같은 명령어를 써준다.
여기서 아래에 쓴 sass명령어는 이렇게 동작한다
npm run sass 터미널에 입력하면
src/styles/main.scss를 루트폴더의 style.css로 컴파일해줘~
라는 명령을 실행한다.
이 컴파일 명령어는 빠져도 동작하는데 전혀 상관이 없다!
{
   "scripts": {
    	"node-sass": "node-sass",
    	"sass": "node-sass -wr --source-map true src/styles/main.scss style.css"
        }
}
postcss.config.js 설정을 해준다.
module.exports = {
	plugins: {
		'postcss-import': {},
		autoprefixer: {},
		tailwindcss: {},
		'postcss-flexbugs-fixes': {},
		'postcss-preset-env': {
			autoprefixer: {
				flexbox: 'no-2009'
			},
			stage: 3,
			features: {
				'custom-properties': false
			}
		}
	}
}
next.config.js 설정을 해준다.
const path = require('path');

module.exports = {
  generateEtags: true,
  reactStrictMode: true,
  trailingSlash: true,
  poweredByHeader: false,
  typescript: {
    ignoreBuildErrors: true,
  },
  sassOptions: {
    includePaths: [path.join(__dirname, 'styles')]
}
}
tailwind.config.js
module.exports = {
  future: {
		removeDeprecatedGapUtilities: true,
		purgeLayersByDefault: true,
	},
  purge: [
    "./src/**/*.{js,ts,jsx,tsx}",
  ],

  content: [
    "./src/**/*.{js,ts,jsx,tsx}",
  ],
  theme: {
    extend: {
      colors:{
        header: {
          blackbg: "#30363A",
          white:"#fff",
        },
     },
      fontFamily: {
        sans: ['Roboto'],

      },

    },
  },
  variants: {},

  plugins: [
    require( 'tailwindcss' ),
		require( 'precss' ),
		require( 'autoprefixer' )
  ],
}
src/pages/_app.tsx
여기엔 scss만 import하면 된다.
scss의 스타일은 className="" 으로 입력하면 된다.
import {HomeLayout} from '../components/layout/HomeLayout';

import '../styles/main.scss';

const Index = () => {
  return (
     <HomeLayout>
      <p className="demofontcolor">잘되는가???</p>

      // 밑부턴 그냥 테일윈드 템플릿
      이 부분은 Layout의 children에 해당하는 영역에 들어갈 것입니다.
      <section className="text-gray-600 body-font">
  <div className="container flex flex-wrap px-5 py-24 mx-auto items-center">
    <div className="md:w-1/2 md:pr-12 md:py-8 md:border-r md:border-b-0 mb-10 md:mb-0 pb-10 border-b border-gray-200">
      <h1 className="sm:text-3xl text-2xl font-medium title-font mb-2 text-gray-900">Pitchfork Kickstarter Taxidermy</h1>
      <p className="leading-relaxed text-base">Locavore cardigan small batch roof party blue bottle blog meggings sartorial jean shorts kickstarter migas sriracha church-key synth succulents. Actually taiyaki neutra, distillery gastropub pok pok ugh.</p>
      <a className="text-indigo-500 inline-flex items-center mt-4">Learn More
        </a>
    </div>
    <div className="flex flex-col md:w-1/2 md:pl-12">
      <h2 className="title-font font-semibold text-gray-800 tracking-wider text-sm mb-3">CATEGORIES</h2>
      <nav className="flex flex-wrap list-none -mb-1">
        <li className="lg:w-1/3 mb-1 w-1/2">
          <a className="text-gray-600 hover:text-gray-800">First Link</a>
        </li>
        <li className="lg:w-1/3 mb-1 w-1/2">
          <a className="text-gray-600 hover:text-gray-800">Second Link</a>
        </li>
        <li className="lg:w-1/3 mb-1 w-1/2">
          <a className="text-gray-600 hover:text-gray-800">Third Link</a>
        </li>
        <li className="lg:w-1/3 mb-1 w-1/2">
          <a className="text-gray-600 hover:text-gray-800">Fourth Link</a>
        </li>
        <li className="lg:w-1/3 mb-1 w-1/2">
          <a className="text-gray-600 hover:text-gray-800">Fifth Link</a>
        </li>
        <li className="lg:w-1/3 mb-1 w-1/2">
          <a className="text-gray-600 hover:text-gray-800">Sixth Link</a>
        </li>
        <li className="lg:w-1/3 mb-1 w-1/2">
          <a className="text-gray-600 hover:text-gray-800">Seventh Link</a>
        </li>
        <li className="lg:w-1/3 mb-1 w-1/2">
          <a className="text-gray-600 hover:text-gray-800">Eighth Link</a>
        </li>
      </nav>
    </div>
  </div>
</section>
    </HomeLayout>
   )
}

export default Index;
_Header.sass로 쓴 스타일 태그와
tailwindcss 가 잘 동작함을 볼수 있다.